

I think we can all agree that it’s gross to drink out of a dirty cup. Don’t let your Zenco aromatherapy sessions get to that!
This article is an easy-to-follow guide on maintaining the hygiene of your Zenco Duo and Zenco Flow vaporizers. The cleaner your devices are, the better vapor you inhale. Grab a towel and soak this in with the Chief Baker.
Jump to:
Dirty Cup Dirty Vapor
Zenco aromatherapy vaporizers redefine vapor delivery, enabling you to ‘drink’ your vapor from a glass chamber. To keep your Zenco Duo and Zenco Flow aromatherapy vaporizer working at peak efficiency, nothing is more important than maintenance.
Aromatherapy vaporizers have the tendency to accumulate buildup of sticky compounds and residue after a while. These remnants may clog up your devices’ ventilation or obscure heating elements, compromising flavour and performance.
Now, there are two ways you can go about avoiding this. A quick clean, which you can perform after each vaporizing session, and a deep clean which we recommend performing after 10 to 15 sessions.

How do I clean Zenco Duo and Zenco Flow glass?
For a quick clean:
All you need is water, dish soap, and cotton balls/cotton pads. We recommend that you do the following steps:
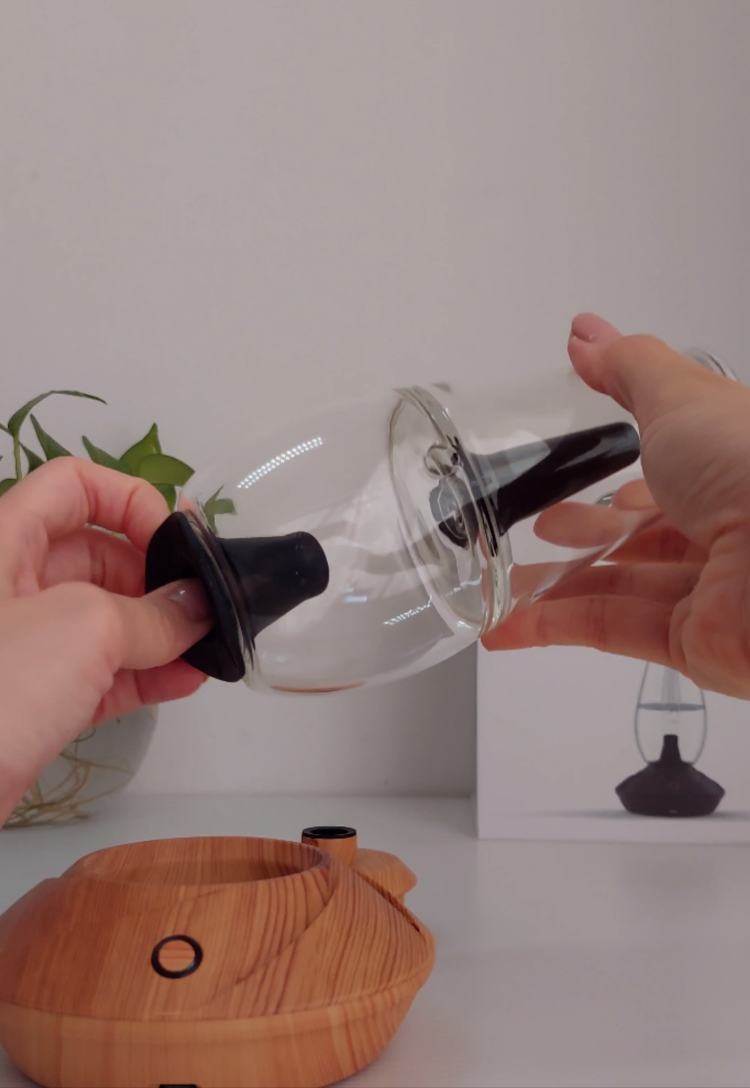
- Remove the black silicone diffuser you can find at the centre of all Zenco glassware. This rubber piece can easily be cleaned with water and dishwashing soap.
- Place your Zenco glass in the dishwasher if you have one.
- If you don’t have a dishwasher, the Zenco glass can simply be cleaned by swiping it with cotton pads and warm soapy water.
- After cleaning, let all parts thoroughly dry before reassembling.
- Perform a burn off before use.

For a deeper clean:
The extra effort will only take less than 15 minutes of your time. Do it as part of your maintenance routine.
- Remove the black silicone diffuser and wash it with water and dish soap. If there’s still buildup, take a wet paper towel and wipe clean.
- Residue generally forms at the base of the glass. Soak the Zenco glass bottom in isopropyl alcohol cleaning solution for about 10 minutes. An isopropyl alcohol cleaning solution like Swish will be most effective as it breaks down the residue quicker than soap.
- Alternatively, you can pour isopropyl alcohol cleaning solution into the glass directly and gently scrub it with the included cleaning brush or kitchen sponge to speed up the process.
- For harder to reach spots like in the Zenco Flow water bubbler glass, you can soak the glass in isopropyl alcohol and give it a good shake to clear the air hole from any gunk.
- Let all parts dry out completely before putting them back together again.
- Perform a burn off before use.
How do I clean the Zenco Quartz and Ceramic Shatterizer coils?
Cleaning Zenco coils can be tricky as it is can be damaged if you’re scrubbing and poking into it too much, so be gentle!


For a quick clean:
- Take a cotton bud/q-tip and dip it into a bit of isopropyl alcohol cleaning solution.
- Press out excess liquid, you want the cotton to be damp but not dripping wet.
- Swish the q-tip around until residues are removed. The quartz coil is open so it can be a bit more fragile, use the same q-tip swishing motion but be more gentle.
- Let the coil dry completely before re-inserting them into the base.
- Perform a burn off before use. We don’t want you to be inhaling any residue isopropyl alcohol!
For a deep clean:
- Both the Quartz and Ceramic coil can be soaked in isopropyl alcohol for a couple of hours.
- Take a cotton bud/q-tip and gently swab around the coil if there are still residues.
- Make sure to also swab the connection piece where you screw in and out the coils.
- Let the coil dry completely before re-inserting them into the base.
- As always, perform a burn off before use.
If you experience clogging after cleaning the coils, that means it’s time to change them out. The coils are meant to be replaced when needed, depending on how heavily they’re used.
There are users asking “can you use water to clean the coils”?
The answer to that is ABSOLUTELY NOT, do not submerge or rinse your coils in water. If the Zenco indicator light flashes red 3 times after cleaning, it means there is a short circuit in the coil and a new one is required.
Coils like the Shatterizer coils are replaceable and not covered under Warranty.
How do I clean the Zenco centre 510 Adaptor Ring?
Learning how to disassemble your aromatherapy vaporizer is 50% of the battle won in maintaining your vaporizer. The base of the Zenco vaporizer houses the 510 adaptor which contains most of the residues and resin from your spent aromatherapy dry herbs and concentrates.


After every couple of sessions, we recommend checking beneath the ring for build-up and if cleaning is needed. Follow these steps to have your Zenco working like new again:
- Lift up the magnetic base cover, and clean the opening with an isopropyl alcohol cleaning solution like Swish and a Q-tip.
- Remove the centre 510 Adaptor ring from the Zenco by unscrewing counter clockwise. Use a firm grip, and wear rubber gloves if needed as it can be tight from the resin build up. If it is too tight, add an atomizer coil and run briefly to heat it up and loosen the bond. Cautiously unscrew it after that, it will be hot.
- Please pay close attention to the brass tip of the centre ring, as it can slide from the rubber insulation. Be careful not to lose it! It is of utmost importance to keep the brass tip clean for positive contact and good airflow. Take a cotton bud/q-tip, douse it with an isopropyl alcohol cleaning solution, and swipe around the contact points and threads.
- In between the brass tip it may be hard to reach with a q-tip, as the gap between the fork-like tip is tiny. You can use something non-abrasive like a tooth pick, dental floss or paperclip to remove any buildup in that hard-to-reach spot.
- Also use the same non-abrasive item to unclog the airhole beneath the ring, popping it in and out a few times should ensure that it is not blocked with resin.
- Clean all contacts beneath the center ring with 99% Isopropyl / denatured alcohol or similar cleaning solution and a Q-tip. Residues from concentrates are much harder to remove and require a stronger cleaning solution like 99% isopropyl alcohol, which is harder to find in stores. Otherwise, 70% or 91% isopropyl alcohol which are easier to find will also do the job.
- The centre ring can be soaked in isopropyl alcohol for an hour or two for a deep clean.
- Allow all parts to dry before re-installing.
- When thoroughly dry, screw on the centre ring using a clockwise motion. After filling up your quartz or ceramic coil, screw it into a charged and powered-on base. If you see the Zenco indicator light flash green, it shows the coil has made a good connection to the heating element. That is a sign that your Zenco’s parts are all cleared out of nasty gunk!

Conclusion
As the saying goes – cleanliness is next to godliness and this applies to your dry herb vaporizer use too!
When in a time pinch or as a weekly habit, do the quick cleanse method which is simply putting your Zenco glassware into the dishwasher or giving it a nice scrub down and wiping down your coils with isopropyl alcohol.
Every couple of months or so, we recommend you to do a deep cleanse of your Zenco parts : the silicone diffuser, the glasses, Quartz coil, ceramic coil and also the Zenco base centre with the 510 adaptor ring.
Don’t neglect the important steps we’ve mentioned in this article and keep your Zenco vaporizer running smoothly for many years to come. Please make sure all your Zenco parts are completely dry before turning on to enjoy your Zen!


